Posted on August 28, 2020 | Last updated on March 23, 2023
Using Lightroom presets is a great way to enhance your images. In this tutorial you will learn how to install Lightroom presets whether you’re using a desktop or smartphone.
In case you already have desktop Lightroom (click here to subscribe to Lightroom Desktop), you can easily sync your presets between Lightroom Desktop and Mobile. The other way is to download Lightroom mobile presets straight to your phone and use it from the free mobile app Adobe Lightroom (iOS or Android) without going through the desktop version.
If you haven’t, you can check out our custom Desktop and Mobile Lightroom presets here.
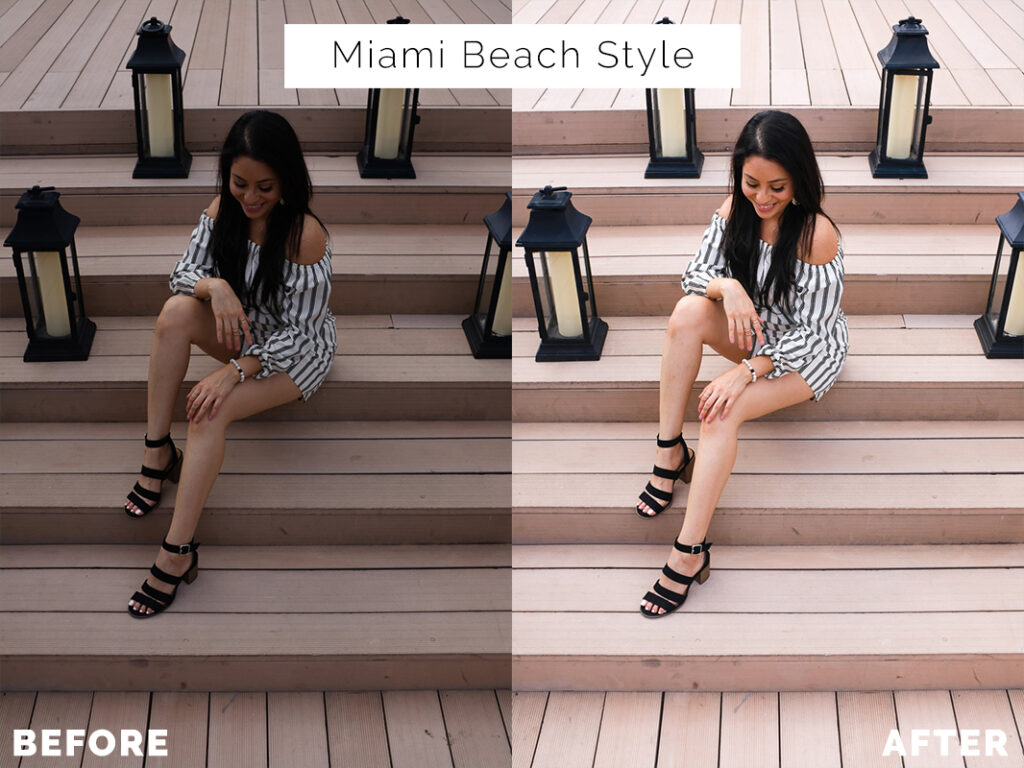
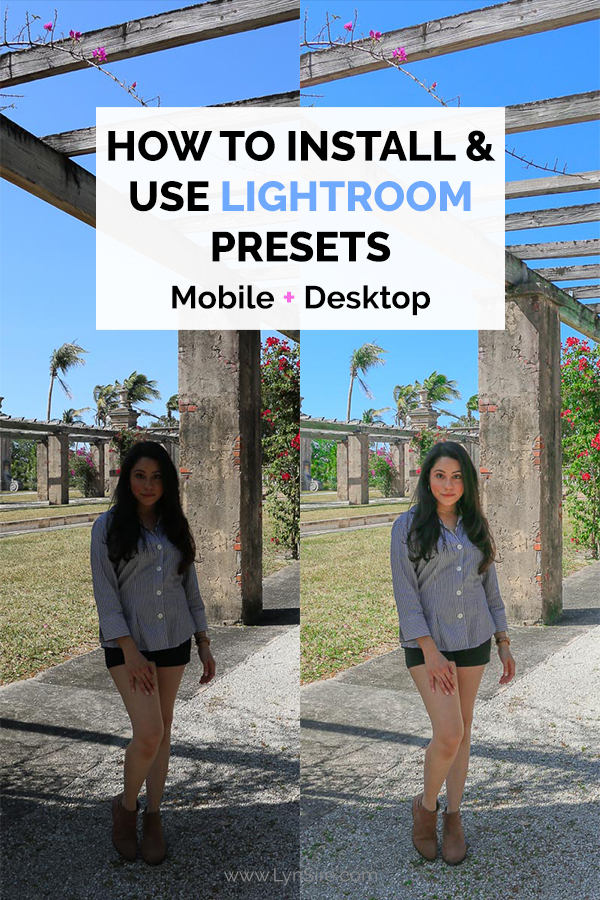
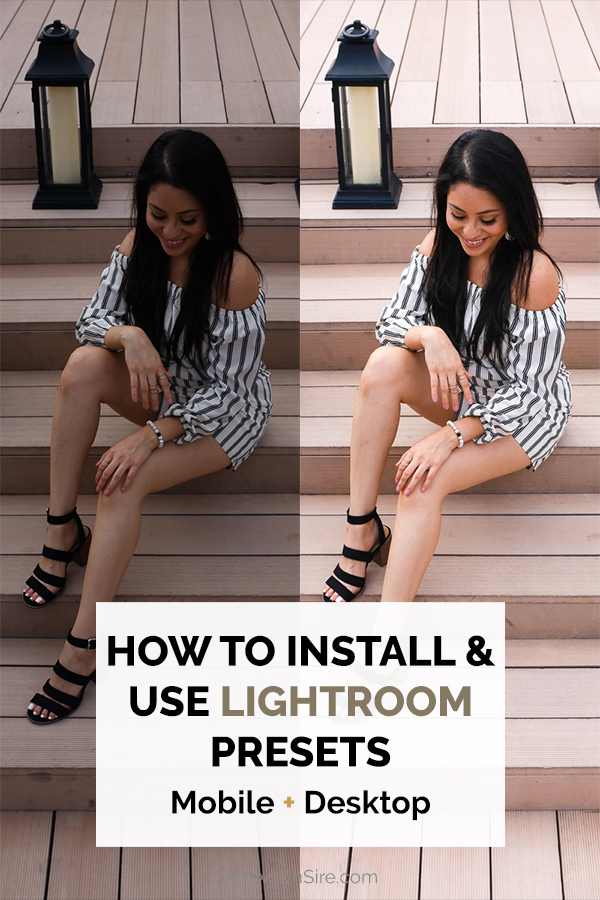
The “Miami Beach Style” preset is part of the “Pop of Color” presets pack.
How to Install and Use Lightroom Presets
IS LIGHTROOM FREE TO USE?
- Lightroom Desktop – The Lightroom desktop version has a free trial, then a monthly subscription plan.
- Lightroom Mobile App (Apple / Google Play) – The Lightroom mobile app is free which you download, and install on your phone.
INSTALLING YOUR PRESETS
Lightroom presets can come in a variety of formats depending if you’re going to use them on desktop or mobile. Ours come in all three formats so you get to choose.
DNG – Files are for the free mobile app Adobe Lightroom, whether you have iOS or Android.
XMP – Files are for the Desktop version of Adobe Lightroom Classic CC.
LrTemplate – Files are for previous Desktop versions of Adobe Lightroom.
TABLE OF CONTENTS
HOW TO INSTALL LIGHTROOM PRESETS FOR MOBILE
Mobile DNG Files
DNG presets can be downloaded directly to your phone (iOS or Android) by following one of the two options…
OPTION 1 – From Mobile
If you bought presets from us you will receive a link from Dropbox. If you don’t have the Dropbox App get it here, it’s free!
Dropbox App – Apple / Google Play
See the screenshots below for more details…
Open the Dropbox app on your phone and tap on the 3 dots (•••) button next to each DNG file:
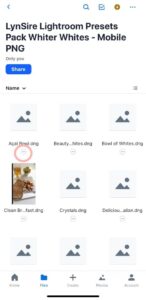
Then tap on Export:
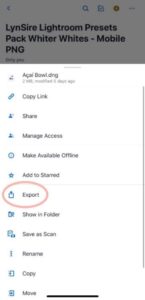
Then tap on Save Image:
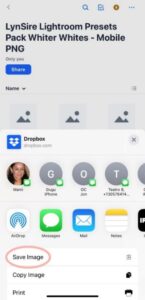
OPTION 2 – From Desktop
If you have a computer/laptop handy, download the file to your Desktop. That should create a new folder with the same name and contains all the DNG files inside.
Now transfer the DNG files to your phone via Dropbox. If you don’t have Dropbox get it here, it’s free! – www.Dropbox.com
Simply drag the folder that contains all the DNG files into your Dropbox and wait for the files to sync. Once all your file is synced, go to the Dropbox app from your phone, and export each DNG file to your phone.
Then follow the same steps from OPTION 1 with detailed screenshots.
STEP 1 – Import Presets to Mobile Lightroom
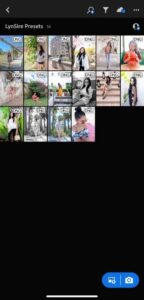
By now you should already have the DNG files saved to your phone. When you go to your photo stream you might see them as blank pictures, don’t panic because that is how they should look!!
Open the Lightroom app and we are going to create a new album. You can name it anything you like. Ex. LynSire Presets.
- Click on the + Sign
- Select Album
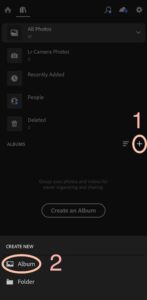
Select the new album you just created.
- Tap on the 3 (•••) dots on the top right corner
- Select Add Photos
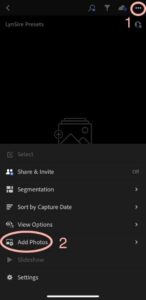
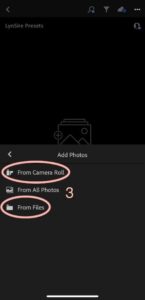
- Whether you downloaded your files to your Camera Roll or to Dropbox, select From Camera Roll or From Files. Select each preset File, and then select Add.
NOTE: If you have it in Dropbox, and you don’t see it in Files, go back to Locations, on the Browse screen click Edit on the top right, and make sure Dropbox is turned on, then click Done.
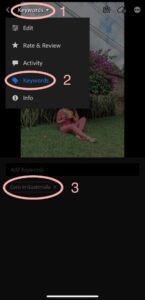
View the Name of Each Preset
Now that you have your presets in Lightroom, you can view the name of each preset by tapping on any DNG file, and on the top left select Edit with the down arrow, and tap on Keywords. The name of the preset should appear. Now you can go back to the down arrow, and select Edit for the next steps.
STEP 2 – Save into mobile Lightroom
Now you should be inside your newly created Album with all the imported DNG files.
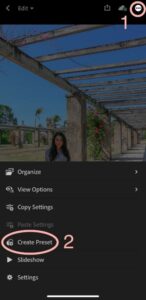
Now tap on the first file. Click on the circle with the 3 (•••) dots on the top right, and tap on Create Preset:
The next few steps are done to apply the preset edits to your own photos:
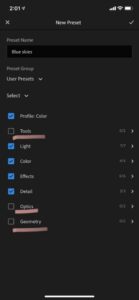
Next, you will see the New Preset screen (screenshot below) that contains all the edits to apply to your own photos.
Preset Name:
Give your preset a name. I highly recommend you use the same name for each preset to know which one you’re using each time.
Preset Group:
You can either save it in User Presets or select Create New Preset Group. I recommend you choose to Create New Preset Group because if you are using many presets at a time this is a good way to keep everything organized. Ex. Pop of Color Presets
Select:
You will see a variety of tool editing options. By default Tools, Optics, and Geometry are unchecked. Leave it as it is.
When you are done, tap on the Checkmark (✓) on the top right.
You will need to repeat this step for each DNG file as you will need to save each preset separately. I know it’s a little tedious, but on the bright side, you will have to do this once! ☺
STEP 3 – Apply presets to your own photos.
The 3rd and final step is the fun part! Go back into your library, and open any photo you would like to apply the preset on.
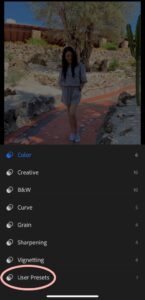
Find the Presets icon in the menu at the bottom of the screen, and tap on it.
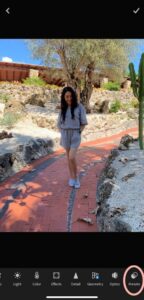
Select the Down Arrow option, and select the group where you saved your new presets. If you saved it in the User Presets group, select that.
Select the appropriate preset with the name you gave it, and tap on the Checkmark (✓). You can still edit the photo to make any necessary adjustments if you like. You can keep applying different presets to your photo to see which one looks best depending on the lighting situation.
Hold on to the image to see a Before and After, pretty cool right?
HOW TO INSTALL LIGHTROOM PRESETS FOR DESKTOP
Desktop XMP and LrTemplate Files
NOTE: While it might be the quickest, it is not the best way. Especially if you want to have a clean folder structure for your Lightroom Presets. If you want the best method, continue down below to “Desktop XMP Files” or “Desktop LrTemplate Files”.
- Open Lightroom
- Go to your Develop Module (Top right corner)
- Click the + on your Presets tab and click Import Presets

That’s all! The Presets can be used in Lightroom now, and you will find it when you open the Presets tab under User Presets. This is by far the quickest and easiest way to install Lightroom Presets in the newest version of Lightroom.
Desktop XMP Files
- Open Lightroom.
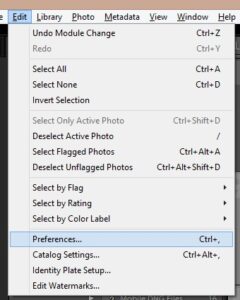
- Windows: Go to File, and scroll down to Preferences / Mac: Go to Lightroom main menu and click Preferences.
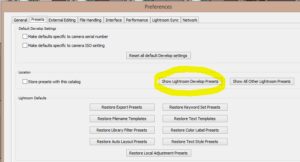
- Go to the Presets tab, and click on Show Lightroom Develop Presets.
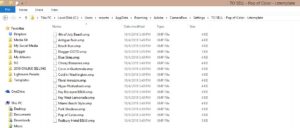
- Paste your Presets Pack Folder containing the XMP files into Settings On Windows it looks something like this:
- Restart Lightroom and enjoy your new presets!
You should be able to see all of your imported Presets as a folder in Lightroom and Camera Raw as well now. Play around with each preset to see which one looks best on your particular photo, have fun!
Desktop LrTemplate Files
- Open Lightroom
- Windows: Go to Edit, and scroll down to Preferences / Mac: Go to Lightroom main menu and click Preferences.
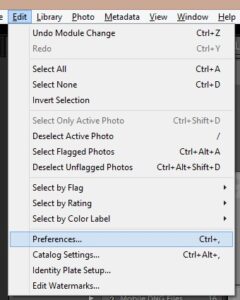
- Go to the Presets tab, and click on Show All Other Lightroom Presets.

- Paste your new Presets Pack Folder containing the .Irtemplate files into the Develop Presets On Windows it looks something like this:
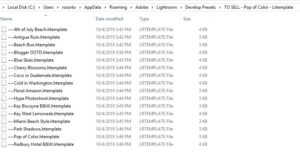
- Restart Lightroom and enjoy your Presets.
You should be able to see all of your imported Presets as a folder in Lightroom now.
That is all! Now you know how to install, save, and use your Lightroom Mobile or Lightroom Desktop presets whether on desktop or mobile.
Play around with each preset to see which one looks best on your particular photo, and importantly have fun! Let us know if you have any questions or issues in the comments :))
This post is all about Lightroom Presets for photo editing.
These Lightroom presets are available here:
- Lightroom Presets “Pop of Color” – Add a pop of color while maintaining true, and natural colors on your skin.
- Lightroom Presets “Whiter Whites” – Make your Whites look Whiter like on product or room photos.
- Lightroom Presets “Pop of Color” and “Whiter Whites” Bundle – Get both preset packs in a bundle.
Save $5 off any item from the Shop page when you sign up to the newsletter here. You will receive a special code.



11 Comments
This is incredibly helpful and useful! I often find that my photos are too dark and now I know how to fix them! Thanks for sharing this!
Kileen
cute & little
This has been on my list to do since I started doing a lot of my own photography. Thank you for such clear direction!
I’ve been using lightroom for a while now and still couldn’t figure out how to install the presets. lol Thank you for this, I’m going to bookmark this for later!
this was actually what i was looking for..glad you shared this way with us…found it very helpful and interesting one indeed…great work though….
This is SO helpful, lightroom kind of freaks me out. Thank you for the help!
I remember I had a hard time trying to figure this out, wish I found your post before. Definitely a great post for those struggling with the presets like I was lol
Thanks for the tutorial. Bookmarking it now because I own so many presets and didn’t what to do with them!
I have heard of Lightroom and how awesome it is. I hope to learn how to use it soon.
This is really great information. I’ll be referring back to this.
Wow nice tutorial.Thank you for the help
Those are some great tips to keep in mind. I’ve never tried that before but will definitely check that out sometime